This article summarizes how to create a zone at different zone levels.
CREATE button:
In the web interface of health.somnofy.com, we have built in a "multifunction button" for everything to be created. You can reach this button everywhere. It allows you to create subjects, users, and zones. Here, we have collected all promotions in one and the same button.
The logic of the zone layout in your municipality or health institution is the core of the administration system at health.somnofy.com.
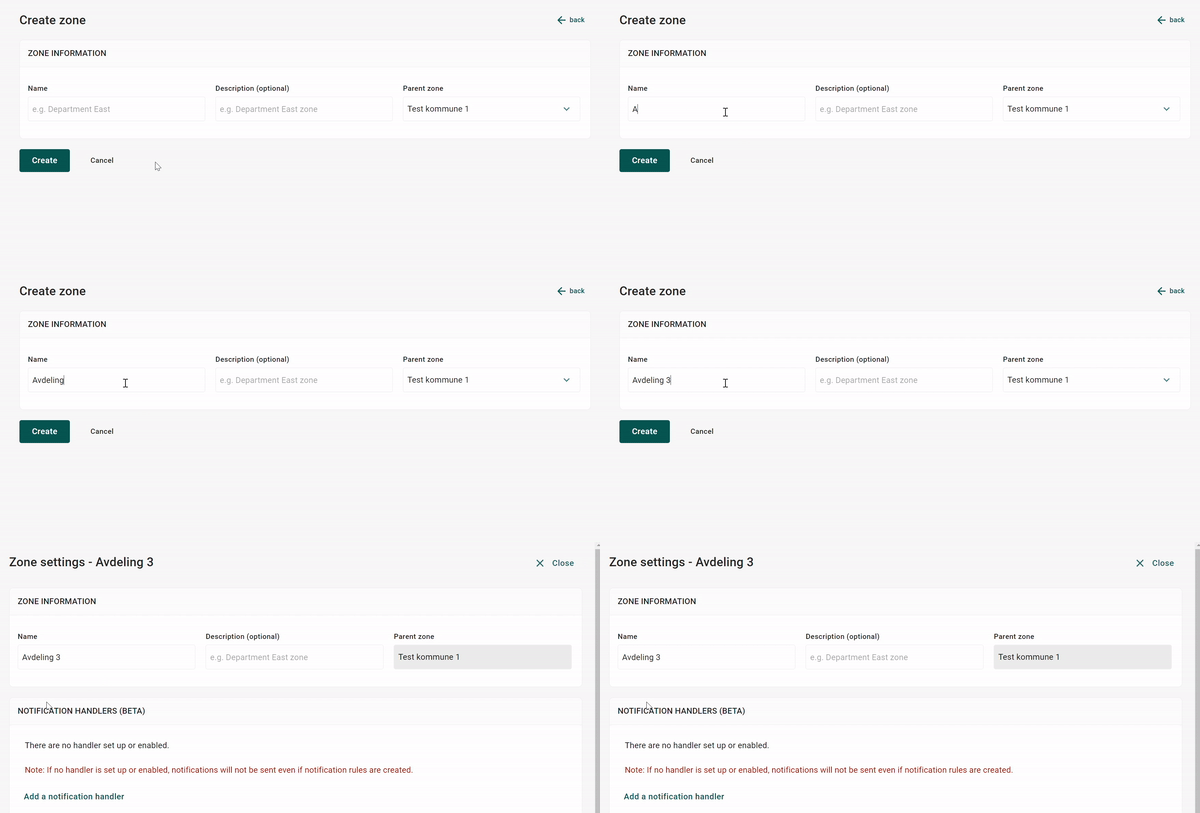
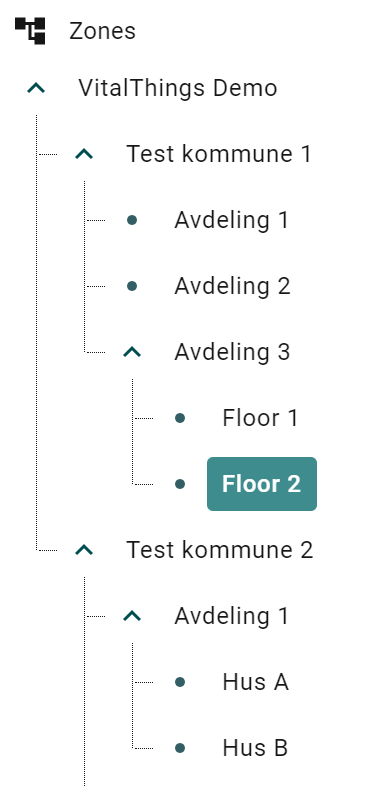
In this article we go through the setup of an example in "VitalThings Demo, Test kommune 1". Within the example, we are creating a new zone for a health institution called "Avdeling 3" with two different floors.
Zoning arrangement VitalThings Demo, Test kommune 1
In health.somnofy.com, select Administration and find the parent zone you want to expand. In this example, this would be "Test kommune 1".
Now we find the Create button and select Zone. The new zone will be called Avdeling 3 and is located one level below Test kommune 1.


We repeat the process for the two floors in Avdeling 3: Create - Zone - Enter name - choose the correct overlying zone.
Continue creating zones until your zone levels look similar to the image on the left.
If you discover that a zone has been created at the wrong level, there are two options available to rectify the situation. You can either rename the zone to align with its correct level, or you can choose to delete the zone and create it again. It is crucial to always double-check that the zone you create is accurately placed under the appropriate Parent Zone level.

